

Key Takeaways
Why Connection Order Matters
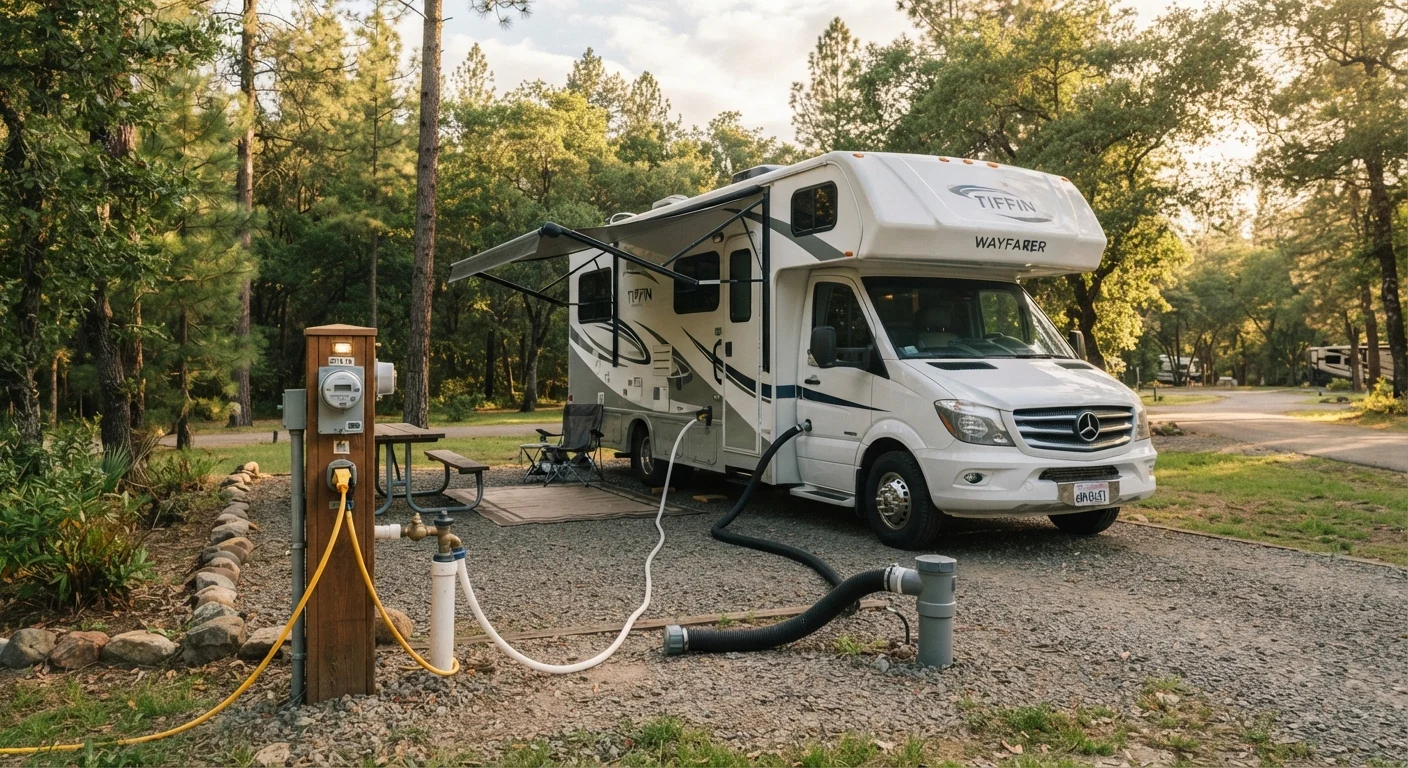
Connecting utilities at a full-hookup campsite isn't just a matter of plugging things in - the sequence you follow directly affects safety and equipment longevity. The standard order is sewer first, water second, electric last. Breaking down reverses that: disconnect electric first, then water, then sewer. This order protects your plumbing from pressure damage, your electrical system from surges, and prevents sewer gas from becoming a nuisance while you're still working.
If you're new to RVing or planning your first outing, the first RV trip guide covers the broader context of campsite setup alongside driving and planning basics. And if you're choosing between campground types, this breakdown of U.S. campground categories explains which sites offer full hookups and how to find them.
What you will need
Surge Protector / EMS
Shields your RV's electrical system from power surges, low voltage, and wiring faults at the pedestal.
Inline Water Pressure Regulator
Limits campground water pressure to a safe level (typically 40-50 PSI) to protect your RV's plumbing.
Potable Water Hose
A food-grade hose rated for drinking water, used to carry fresh water from the spigot to your RV inlet.
Sewer Hose Kit
A flexible hose with bayonet fittings that connects your RV's drain outlet to the campsite sewer cleanout.
Sewer Hose Support Ramp
Creates a downward slope from the RV drain outlet to the cleanout so waste flows completely by gravity.
Rubber Gloves
Protects your hands during sewer hose connections and disconnections.
Power Adapter (Dogbone)
Adapts your RV's power cord plug to a different pedestal receptacle type when amperages differ.
Step-by-Step: Connecting at a Full-Hookup Site
Follow these steps each time you set up at a site with electric, water, and sewer connections. The process typically takes 15 to 30 minutes once you're practiced.
Position and level your RV
Before touching any utility connection, park and level your rig completely. Set your wheel chocks and deploy leveling blocks or your automatic leveling system. Utilities must be connected to a stationary RV - connecting power or water and then repositioning the vehicle risks damaging hoses, cords, and fittings.
Inspect the utility pedestal
Walk to the site's electrical pedestal and examine it before plugging anything in. Look for visible damage, scorch marks, corrosion, or a tripped breaker. Check whether the available receptacles match your RV's power cord - 30-amp (TT-30) or 50-amp (14-50). If the pedestal looks damaged or the breaker is tripped and won't reset, notify campground staff before proceeding.
Connect the sewer hose
Put on your rubber gloves. Attach the sewer hose to your RV's drain outlet first, ensuring the bayonet fitting is fully locked. Run the hose to the campsite cleanout, using your support ramp to maintain a continuous downward slope. Secure the end fitting into the cleanout and use a sewer donut or rubber seal to prevent odors from escaping. Keep both tank valves closed at this stage.
For a deeper look at how the gray and black tank systems work, see the guide to RV holding tanks.
Connect the water supply
Thread your inline pressure regulator onto the campground spigot first - always attach it to the source, not the RV inlet. Connect your potable water hose to the regulator, then run the other end to your RV's city water inlet. Hand-tighten all connections; over-tightening plastic fittings can crack them. Turn the spigot on slowly and check the hose and fittings for drips before going further.
Connect shore power
Plug your surge protector or EMS into the pedestal receptacle first, then plug your RV's power cord into the protector. Confirm the pedestal breaker is off before plugging in if that option is available, then switch it on after the cord is seated. Allow your EMS a moment to analyze the circuit - most units display a green indicator when power is safe to accept.
Verify all connections and check for issues
Do a full walk-around before heading inside. Check the sewer hose for kinks or low spots where waste could pool. Confirm the water hose has no drips at either connection point. Verify the power cord is fully seated and not kinked or running where it could be tripped over. Inside, confirm your water pump is off (you're on city water now) and that 120V appliances are powering normally.
Keep a Setup Checklist in Your Rig
Even experienced RVers benefit from a laminated checklist stored in a consistent spot - a cabinet door near the entry, for example. It only takes one missed step (like forgetting to switch off the water pump after connecting city water) to cause a problem. A checklist costs nothing and removes the guesswork after a long drive.
Campground Power Is Not Always Reliable
Pedestal wiring at some campgrounds - particularly older private parks - can be incorrectly wired, supply low voltage, or deliver power spikes. A quality surge protector or Electrical Management System (EMS) is not optional equipment. Plugging directly into an unverified pedestal without protection puts your converter, refrigerator, and other 120V appliances at risk.
Once you're set up and the season winds down, your next task will be protecting everything you've just connected from winter damage. The RV winterization walkthrough covers what needs to happen before storage to prevent burst pipes and freeze damage.